The Ultimate Guide to Installing LED Tractor Lights
- bestautolamp.com
Table of Contents
Installing LED tractor lights will make a world of difference when it comes to improving visibility and safety on your farm or worksite. LED tractor lights are bright and energy efficient, making them ideal for nighttime work or low-light conditions. This guide will walk you through the basic steps to install LED lights on your tractor.
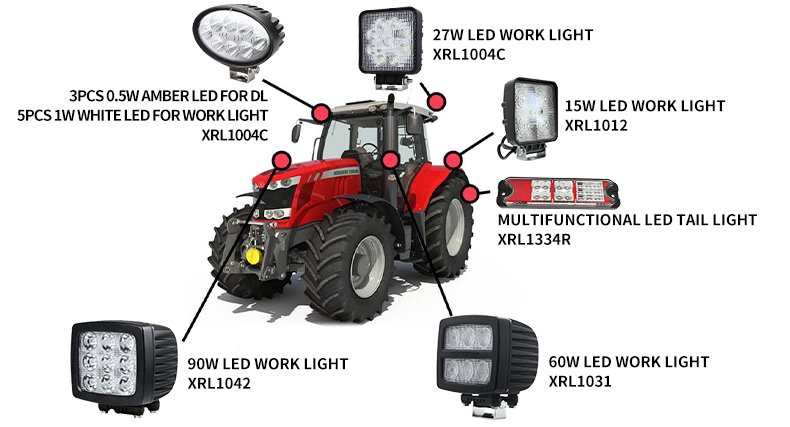
1. Choose the Right LED Tractor Lights for Your Tractor
Before you begin installation, it’s critical to choose the right tractor led light. Consider the following:
Brightness: Look for a lumen rating that fits your specific needs – the higher the lumens, the brighter the light.
Beam pattern: Choose a flood light for broad illumination, or a spot light for focused light.
Durability: Make sure the light is rugged and weatherproof to withstand outdoor conditions.
Power consumption: Choose an energy-efficient model that provides excellent brightness with low power consumption.

2. Find the Best Mounting Point
Determining the right mounting point is critical to achieving optimal light performance. Common locations include:
Front of tractor: Great for illuminating the work area ahead.
Rear of tractor: Great for when backing up or towing equipment.
Side Mounting: Helps with side visibility, especially in tight spaces.
Make sure the chosen location does not obstruct other essential functions of the tractor.
3. Prepare the Mounting Area
After selecting a mounting point, prepare the area:
Clean the surface: Remove any dirt or debris to ensure a secure mount.
Check for obstructions: Make sure it will not interfere with moving parts or other equipment.
Mark Drill Points: Use a pencil to mark where you will drill holes for the mounting.
4. Mount the LED Tractor Light
Now it’s time to mount the tractor work light:
Use the appropriate hardware: Depending on the design of your light, you may need brackets, bolts, or screws.
Secure the Light: Tighten the screws to ensure the light is stable, but avoid overtightening, which can damage the light.
5. Route the Wiring
Neatly routing the wires is essential for both functionality and aesthetics:
Plan the routing path: Choose routing that avoids sharp edges and moving parts.
Use Cable Ties: Secure the wires to prevent them from hanging loose or getting snagged.
6. Connect to the Electrical System
Connecting the led light for tractor to the electrical system is a critical step:
Identify the power source: Typically, you will connect to the tractor’s battery or electrical panel.
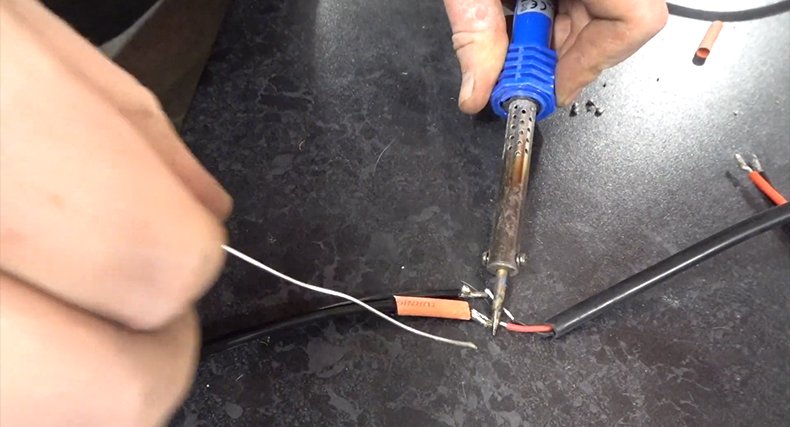
Use the appropriate connectors: Be sure to use weather-resistant connectors to prevent corrosion.
Follow the wiring diagram: Refer to the manufacturer’s instructions for specific wiring details.
7. Test the Tractor LED Light
Before you finish, test the led lights for tractor:
Check functionality: Turn the lights on to make sure they are functioning properly.
Adjust aim: If necessary, adjust the angle of the lights for optimal coverage.
8. Connect and Finish
Finally, tidy up the installation:
Secure loose wires: Use extra cable ties to keep everything organized.
Inspect the installation: Make sure everything is securely in place and operating as intended.

By following the steps below, you can successfully install LED tractor lights for enhanced visibility and safety. Upgrading to tractor led light kits will not only improve your nighttime operations, but it will also extend the life of your lighting system because they are durable and efficient. Enjoy enhanced visibility and drive safely!
Share the Post:

Focusing on customized solutions and customer service, we have excellent sales, engineering and production teams, which can bring you efficient and high-quality docking.
We look forward to hearing from you!


